How to Make a Banner? Creating Your Own Banner with Different Design Tools.
Explore
Jul 27, 2020
Updated Jul 27, 2020

Successful ad campaigns all have one thing in common: they all use high-quality ads that have a stunning visual appeal. Not all banners work fine though; some can cause confusion or even irritation whereas some can truly inspire. That’s why it is essential to make a banner that is as engaging as possible which will truly satisfy your business goals. Below, we will go through a few different ways of creating banners of any kind. On top of that, we will discuss the most appropriate method that will help you generate cool banners with absolutely no coding skills. As a result, you will get a beautifully designed banner that is ready-to-use across many different ad networks.
Essential parts of a banner
I assume you already know what a banner is, but if not, let me remind you that it consists of key essential parts:
Image background – this gets your audience’s attention and is their first impression of your brand
Logo – this helps your audience recognize your brand as unique
Text/slogan – this informs them about your ad campaign including details about your product. Best to keep this part short and sweet
Call-to-action – the most important part of your banner. This is what drives users to click on your ad
To ensure your ad looks as appealing as possible, let’s quickly talk about the different ad sizes, ad specs, and ways to create banners with no design issues. I would like to begin by describing the types of banner ads, ad formats, and the most popular banner dimensions used in well-known ad networks, like Google and Facebook.
There are 3 types of banners: mobile, desktop and tablet. According to Statista, there are 3.5 billion (with a B!) smartphone users in the world today. Roughly 45% of the world’s population owns a smartphone, which they use to surf online for countless hours each day. In some countries with emerging economies, the percentage is significantly higher and can reach upwards of 90-93%!
Knowing this, we suggest that you focus your attention on creating mobile ads rather than desktop as they are no longer as effective.
How to create a banner for Google ad network
Ok, now let’s see the sizes of mobile ads that are compatible with Google: 300×250, 320×50, 320×100, 250×250, 200×200.
Choosing which banner size to run an effective ad campaign can be downright confusing sometimes. For instance, if you would like to show your product (style, image, details) and focus mostly on the visual part, use the 300×250 px banner size. If your ad goals are to get as many clicks as possible and drive users to a specific landing page where you show all your products, use the 320×100 px banner size. This size yields higher CTRs compared to the traditional 320×50 px banner size. Important note: regardless of the dimensions, all banner ads must be no larger than 150 KB in file size.
Also, you have to make sure your final designs are saved in the correct format. For example, Google accepts files in JPEG, SWF, PNG, and GIF. The best compression option gives you a file saved in JPEG.
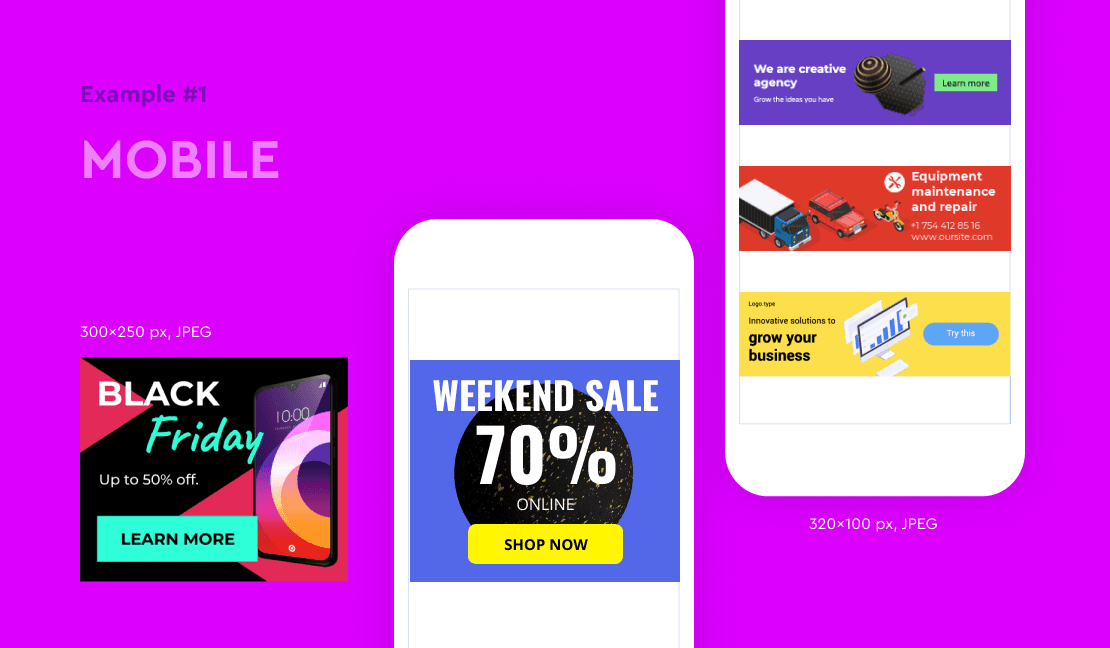
Below are the examples of mobile banners 320×100px and 300×250px:
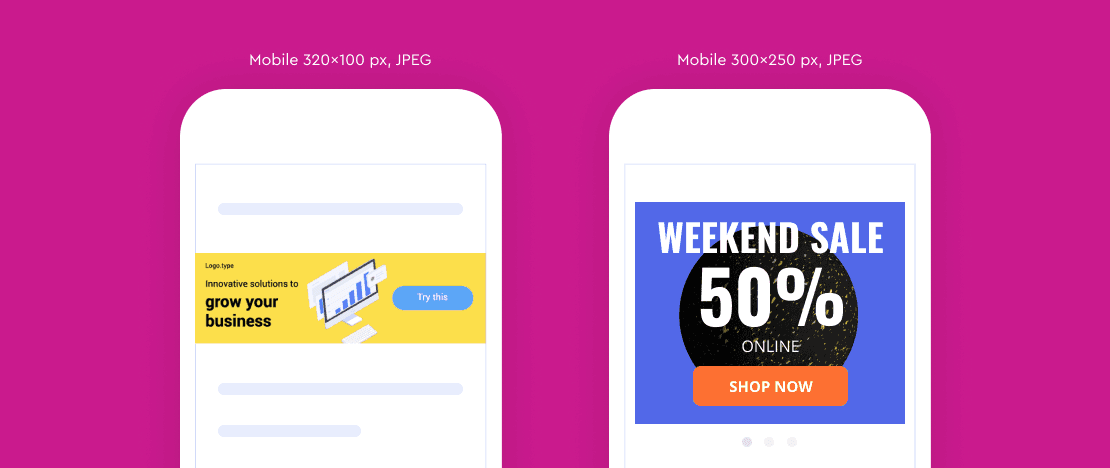
Mobile ads in jpeg
If you are in a hurry, pre-designed and ready-to-use banner templates are the best option to quickly set up an ad campaign through Google. A huge selection of beautifully designed and eye-catching templates could be found here. Just select the necessary ad size and ad format in section “Display” and you’re all set. Alternatively, you can create an ad banner from scratch using your own background images or explore enormous stock photo libraries from sites such as Unsplash here. This brief tutorial will show you how to do it in minutes.
Tutorial: How to make an animated banner on Viewst Design App
How to create a banner for Facebook audience network (pro tips included)
If your target audience is mostly on Facebook, you would have to launch an ad campaign there. The below steps and tips regarding sizing & specs for banners will help you to do it effectively.
Facebook supports the following ad formats and destinations:
1. Video: use this format to build brand awareness and stay top of mind with users so when it comes time for them to buy something, they will think about your brand first. Also, video is one of the best ways to show off your product features with sound and motion.
Tip #1: A year ago, Facebook announced that the newsfeed will be optimized by the high-quality and original videos
Tip #2: Video ads on Facebook that are 30 seconds or shorter will loop for approximately 90 seconds (e.g. 30 seconds x 3 loops = 90 seconds, 16 sec x 6 loops = 96 sec).
Tip #3: Shorter videos get more complete views. More people watch to the end of videos that are less than 15 seconds long.
For example, Starbucks predominantly posts videos showcasing their products which are less than 15 seconds long. Videos between 5-10 seconds performed better and gave an average 2.4x more views and 2x more interactions than those that were longer than 10 seconds. For instance, Almond Honey Flat White (0:05 sec) had 280k views and 6k interactions, Choose your vibe (0:09 sec) garnered 577k views, and 8.4k interactions, while Ice Cloud Michiato (0:13 sec) was viewed by only 175k people and received just 2.8k interactions.
Tip #4 (Pro): use Facebook Live. This is the best way to interact with your viewers in real-time. Use your time to respond to your viewers’ questions and take a look at their live reactions. Most importantly, Facebook Live gives 6x more engagement than regular video.
2. Image: such type of banner increases the interest of users in your brand, raises awareness of your goods & services, drives people to a destination website or a landing page via the use of high-quality visuals
Tip #1: Use images with bright colors and avoid those that have many small details or texts.
Tip #2: Keep it simple. Put a clear message that makes people want to take action (e.g. call-to-action button shall state: “Buy now”, “Try now”, “Learn more”, “Sign up”, etc.). Make your message short and actionable.
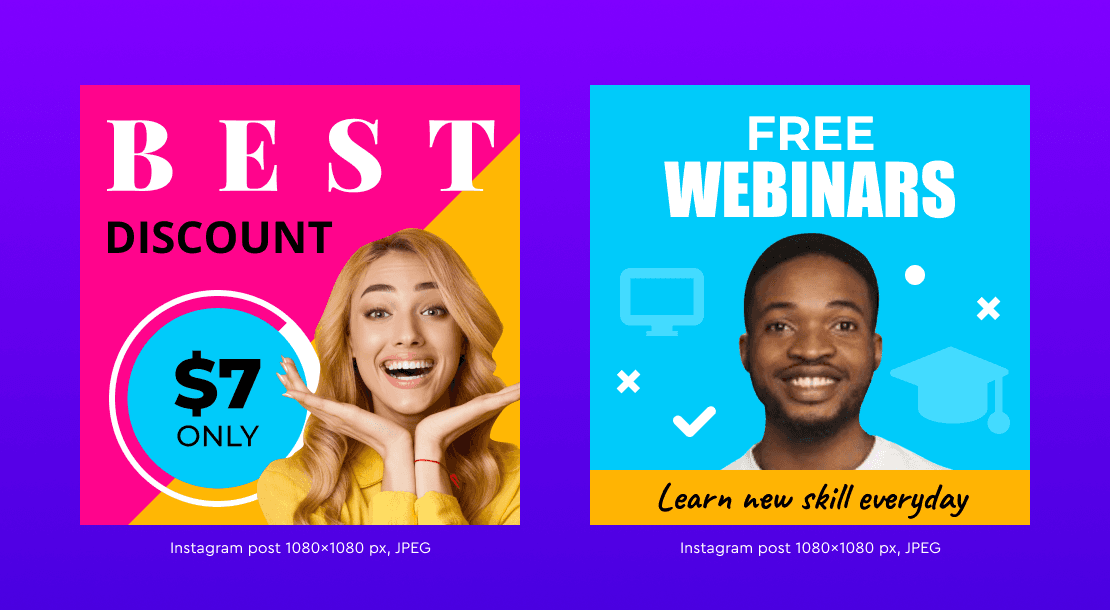
Below are examples with the right design of CTA:
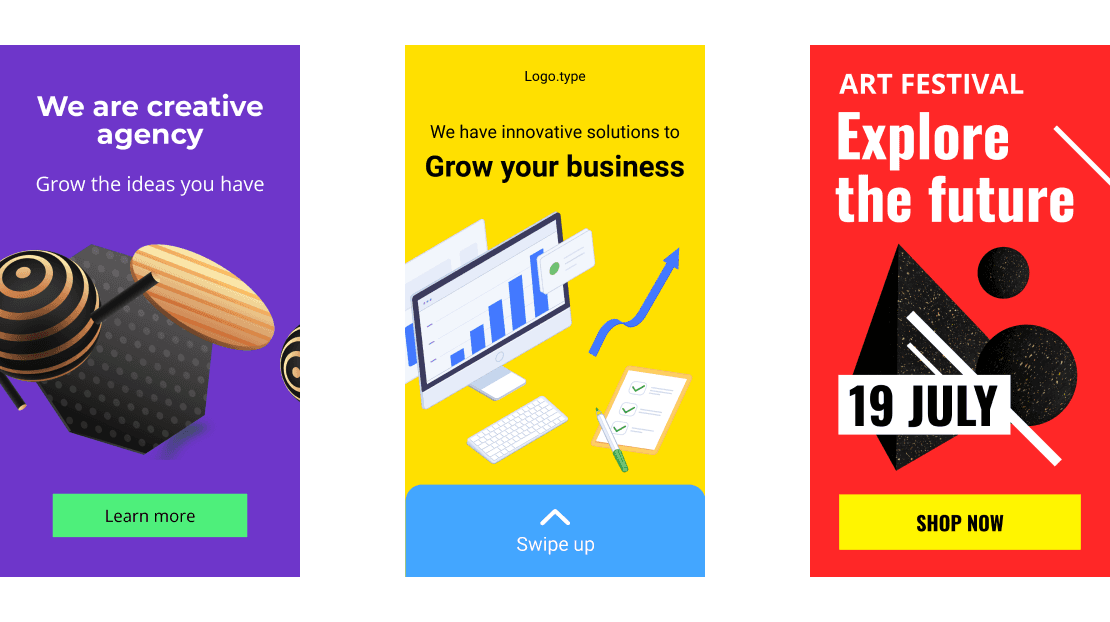
Banners with the right design of CTA
Tip #3: Happy people that smile at you and looking straight at a user will help to persuade people to buy products or services and evoke happiness too. An image of a happy woman can be used for any type of product you need to promote: from nutrition and wellness to a new dress or shoes and even financial institutions where it can be tied to an idea of getting freedom from financial burdens. Did you ever notice how Coca-Cola uses happiness in their ad campaigns? One of the most successful 'taste the feeling' ad campaigns, with the 'Open Happiness' tagline, is the best example.
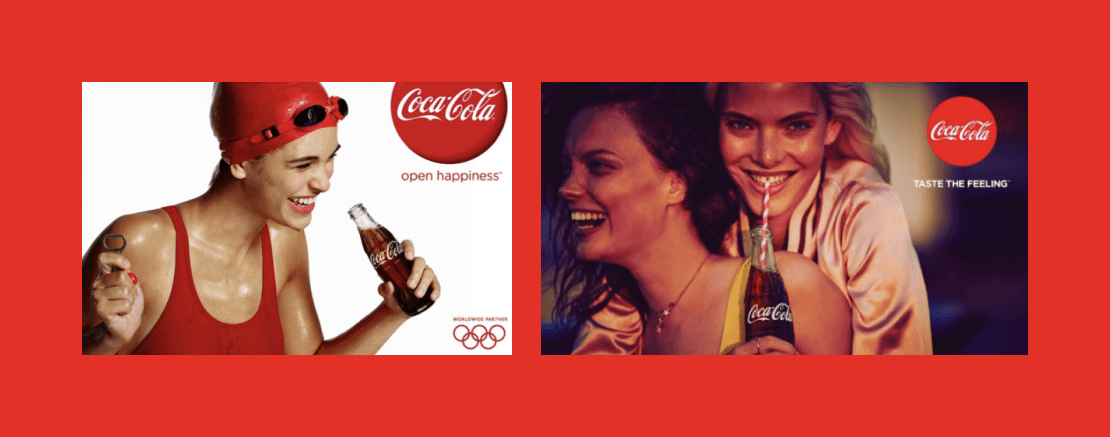
Coca Cola 'taste the feeling' ad campaign
Banner Templates with Happy Faces available on viewst.com
3. Collection: this ad format is perfect for instant customer acquisition. Collection ads can encourage shopping impulses by displaying items from a product catalog and allowing users to browse them in one place. This is applicable when you want to showcase 4 or more products. You can also add videos for your collection to provide a richer experience to your potential customers.
4. Carousel: showcase up to 10 images or videos within a single ad to encourage users to scroll through the slides that showcase many different products.
According to Facebook, carousel ads yield a 30-50% lower cost-per-conversion than other ad types and 20-30% lower cost-per-click.
Tip #1: If you would like to make your carousel ads more appealing and engaging, go to viewst.com, and use our beautifully designed and perfectly animated templates. These banner ads will encourage your potential customers to learn more about your brand. It is super easy to do; quickly upload images of your products using a simple drag & drop option and customize our ready-to-use banners with your own messages. Start your own magic here
5. Post-engagement: boosting posts to increase user engagement with more likes, shares, comments.
6. Lead generation ads: image or video that collects information from people who are interested in your business.
Finally, I would like to share the most important #ProTip applicable to all types of Facebook ads: experiment and do A/B testing. It is extremely valuable to know all types of ad formats you may set up on Facebook Audience Networks, but most important is to test your individual images to be sure you are getting the best performance possible.
3 ways of designing a banner, 1 smart approach
Above we discovered the specs of banners for major ad networks. It might confuse you a bit as there are so many rules and specifics. So if you are not a designer, it might be hard to create an appealing banner compatible with all these ad networks. Don’t worry though, we will show you the different ways you can make your own banners and a smart approach to help you to make the production process easy and fun.
#1 Outsourcing to a professional designer
Check portfolios of short-listed designers on Behance. It will show you whether your aesthetic taste meshes with a specific designer.
When it comes to pricing, you might pay just $15 for a banner design for a professional on Fiverr, but is it really worth it? We will see later below.
#2 Creating a banner yourself using different graphic design software
Today, your ad generating efforts are disrupted by the abundance of platforms offering everything from design, animation, photo editing and resizing of web or video banners. Figma, Adobe Photoshop, Adobe Illustrator, Adobe After Effects, SketchApp, inDesign, are just a few notable platforms – although there are many others out there.
The complexities of navigating the different structures and interfaces of each platform require a considerable time commitment to master. Moreover, jumping from one app to another is both time-consuming and can lead to errors. Even if such barriers are not a problem, the cost of paying for each of these platforms poses an additional challenge. Does it make sense to your bottom line to go this route?
Let’s go over some of the examples of how to create a banner ad using different kinds of software:
Photoshop
Photoshop is an incredibly powerful image editing software that is known for its versatility and complexity. That being said, how to make banner in Photoshop? Here’s a general guide to teach you some of the basic actions:
Getting to File > New allows you to create a new document to work with. Selecting “Web” and entering specific dimensions for your future banner is the next step (300 x 250, 480 x 90, or others). Clicking “Create” should prompt a new blank image to open up as your starting point.
As a main target of a banner, you’re likely to have a product image of sorts that would be the centerpiece of that banner. Clicking File > Open allows you to add your product’s images to interact with them within the borders of your future banner. A file with a transparent background in a .png format is recommended so that you can change the background color freely.
Next you’ll have to go to Window > Arrange > Tile All Vertically so that your banner image and your product image are positioned side-by-side.
To move your product image to your banner, you have to use the Move tool (a button that points in four directions at once, in the upper left corner of the interface). The product image tab can be closed after the movement is complete.
Going into Edit > Free Transform allows you to form-fit your product image so that it fits into your blank banner template using markers on the borders of your product image, as well as the general ability to move the image around.
Next you’ll have to use the Paint Bucket tool (an icon on the toolbar that looks like a bucket that leaks paint) to change the color of your background. Make sure that the layer you’re coloring is Layer 1 so that your image is not affected by this change.
After deciding your background color, it’s time to add some text to your banner. It can be done with the Text tool (Big letter “T” in the toolbar), choose it and click on the banner afterwards to get a text box that you can fill with any text you want. Additional customization of the text is also available, including fonts, sizes, colors, and so on.
The last part of our relatively simple banner is the button that we’ll be placing underneath the text box from the previous step. First of all, the rectangular button must be created using the Rectangle tool (Rectangle-looking button on the toolbox). After clicking and dragging your rectangle to fit your desired button size, you can also choose the color of the button.
The Text tool would be helpful in this case so that our button has something written within. Clicking the rectangle with the Text tool chosen allows you to start writing directly within the borders of your button. Use this to write some form of a call to action, such as “Shop now”, Buy now”, etc.
Saving the image in the correct way is another important part, so that you can use it later. Go to File > Save As to be able to choose the JPG format to save the image for your advertising needs. Saving the same image in the PSD format allows you to keep all of your layers and objects so that you can change this banner however you want without starting from scratch.
This is the process of how to make banner in Photoshop. This banner only has a product image, a text header and a button. It is possible to create much more complex banners using the same technique, although it would take more effort to do so. You can see that the entire process is not exactly easy and might seem long and confusing for some people. Luckily enough, there are many different alternatives.
MS Paint
Surprisingly enough, Microsoft Paint is also a decent tool for creating simple banners in the process that is somewhat similar to Photoshop, albeit easier. Now let’s go over some of the basic banner-related operations within MS Paint:
As usual, you have to start with some sort of a blank slate, if you don’t have a template of sorts ready for your changes. To create a new file you have to go over to File > New, creating an entirely new document for you to work with.
First of all, you have to resize your image to fit the specifications of your future banner, it can be done using the “Resize” banner on the toolbar. After clicking “Resize”, you can manually input the necessary picture dimensions (don’t forget to turn off the “keep proportions” option so that you can change your aspect ratio, as well). Click “Ok” when you’re finished.
Choosing an appropriate background color is a good first step, and there’s even a specific button on the toolbar called “Color 1” that represents the color of your background right now. Click it to change the background color.
The following step is to use the “Paste” tab to add your own images or objects to your future banner. After choosing one of your local images for that purpose, you can drag it freely across the document as long as it’s selected. Resizing your image or object is also possible by using the “Resize” button when the image in question is selected, that way you can fit it into the borders of the banner.
Objects or images are not the only examples of things that can be added, you can also add text to your banner by using the Text tool from the toolbar (the button with the big letter “A” on it)
If your document is larger than the intended banner size, you can crop it using the “Select” tool and by specifying the dimensions of the selection using the “Resize” tool. After making sure that everything is correct, press “Crop” to cut off the unnecessary parts of your future banner.
Saving your banner is also essential for your future use, although there is no way to save the banner as a combination of interactable elements like in Photoshop, so you’ll have to start from scratch basically every time.
As you can see, MS Paint is a somewhat more simplistic answer to the question of “How to make a banner ad?”. It’s not as versatile as Photoshop, but it’s also much more simplistic and this might be a necessary change for some people that feel overwhelmed by Photoshop’s complexity.
Microsoft PowerPoint
Another example of an unexpected participant in the banner editing department is MS PowerPoint, allowing for extensive visual customization of your future banner. There are some nuances that have to be kept in mind, but first of all – how to design a banner using PowerPoint? You’ll find out the answer below:
As usual, we’re starting off with the blank slate by choosing the Create > Blank Presentation on the PowerPoint home screen. That way you’ll get what looks like a blank presentation with only one slide included. In some cases, your first slide would be the Title slide – it’s important to change its type into the Blank one, or to create a new Blank slide and delete the previous one.
Click the Insert > Shapes and choose a basic rectangular shape to serve as a basis for your banner ad. Click and drag it to get it to the desired size.
The “Shape Format” menu allows for multiple customization options for your basic shape, including coloring changes, shape changes, adding text, and so on. Customize your basis for a banner in any way you want.
The “Insert” tab can also be used to add additional objects to your banner, such as photos, logos, pictures and so on. Any object that you’re adding can be immediately resized to fit your banner borders.
Adding text is also possible through the “Insert” tab, and you can customize however you want, including different fonts, coloring, shapes, etc.
After you’re done, click Home > Select… > Select All so that all of the parts of your banner are selected at once. It’s important for the slide itself to be blank for the saving process to go through correctly. The “Select All” option is also available via Ctrl+A command (Windows) or via Command+A (Mac) command.
After you’ve selected the entirety of your banner, right-click on any element of your banner that is not text and choose the “Save as Picture…” option. This allows you to save a specific part of your slide as a separate image and use it however you like. You can also save the PowerPoint file, as well, if you want to work with it later.
As a surprising development, PowerPoint is a viable option when it comes to creating a banner for yourself. Although there are some limitations included in the mix – the general process is simple enough for most people to understand.
Microsoft Word
While we’re on the topic of banner creation with Microsoft tools, it’s important to mention that MS Word can also be used to create banners. As with most of these tools, there are two methods of doing so: by using one of the pre-made banners or by creating an entire banner from scratch.
Later versions of MS Word allow you to look for a template online when you’re creating a new document (by clicking “File”, and then “New”). You’ll have to type “banner” as a search request to actually find banner-related templates, though.
When you’ve chosen your template, you have to click on it and use the “Create” button to actually transfer all of the template’s details onto your blank document to start editing.
Next, you’ll have a free field of editing the template in question, either by changing the images, adding or deleting text messages, or moving some of the template’s fragments. New images can be added using the “Picture” option in the “Insert” tab, and your fonts can be changed with the “Font” menu on the main tab.
The last important step of this process is saving the results of your efforts when you’re done with the editing step. Your new banner can be saved using either the “Save” icon in the upper left part of the window, or by choosing the “Save” option in the “File” menu.
It’s also possible to create a banner with Word without using any kinds of templates, that way only two of the steps from the list above would change:
Clicking “File” and “New” is still the first step of your process of creating an entire banner, even if the method is slightly different now.
It’s also important to properly set the layout of your future banner by clicking the “Layout” tab and choosing the “Margins” option. In the following window you’ll be able to either choose one of the presets or input the dimensions yourself, depending on what is the shape of a banner you want to have.
The following steps are mostly similar, with you adding content to your banner and/or changing it however you want, and then saving the entire project as your banner.
Google Web Designer
Going to the less obvious means of creating a banner, there’s a specific tool for that called Google Web Designer. While the tool itself is relatively unpopular, it’s also another way for you to answer the question of “How to make custom banners?”. Here are some of the main steps when it comes to working with Google Web Designer:
After downloading and launching the tool in question, you’ll be able to land on a title screen. From there, click either File > New… or “Create New File” to continue.
You’ll be able to see the additional window titled “Create New Blank File”. Here you can specify your preferred ad type (Banner), as well as a number of additional options, such as the name for the future HTML file, the save location, the target environment (Display & Video 360), and the ability to choose between automatically resized ads and a manual dimension input. Click “Ok” when you’re done.
As soon as you’re done with setting up your banner parameters, you’ll be greeted with a blank page that is already resized to meet your specific parameters. Now you can add various images, videos and other objects to make your banner unique and special. This can be done by either the simple drag-and-drop or via image tags.
A final step of this process is one of the most important ones, and it is all about adding a call to action. Since the banner we’re creating is going to be in HTML format already, it’s possible to add some variation of a clickable button that would take the user to a specific website promoted by the ad in question. This can be done via the Tap Area component that you have to take from the “Components” folder and position it over your “button”.
Next, you’ll have to add an event (“+” button in the “Events” panel) for another window to appear. In this window, it’s possible to change several different options about the purpose of this button, such as the intended Action (Google Ad > Exit ad), the Event type (Tap Area > Touch/Click), multiple configuration parameters (URL, metrics ID, collapse on exit, pause media on exit, etc), and so on.
It’s also possible to preview your banner in its final form before saving it via the “Preview” button (it acts as if you’ve opened a source HTML file in a browser). After you’re done with the creative part of the process, you’re free to save your banner and use it however you like.
While not as popular or well-known as the other options, Google Web Designer is still a viable choice with some case-specific advantages that people might find interesting.
Online Banner Constructor
If we’re going for a solution that is as simple as it gets – there are plenty different online banner generators with relatively similar feature sets, the biggest difference between most of them is the size of the local template/object library. Next we’ll list some of the examples of popular banner generators.
Fotor is a highly-regarded online platform for image editing that also offers extensive customization tools to make each and every banner unique and one-of-a-kind.
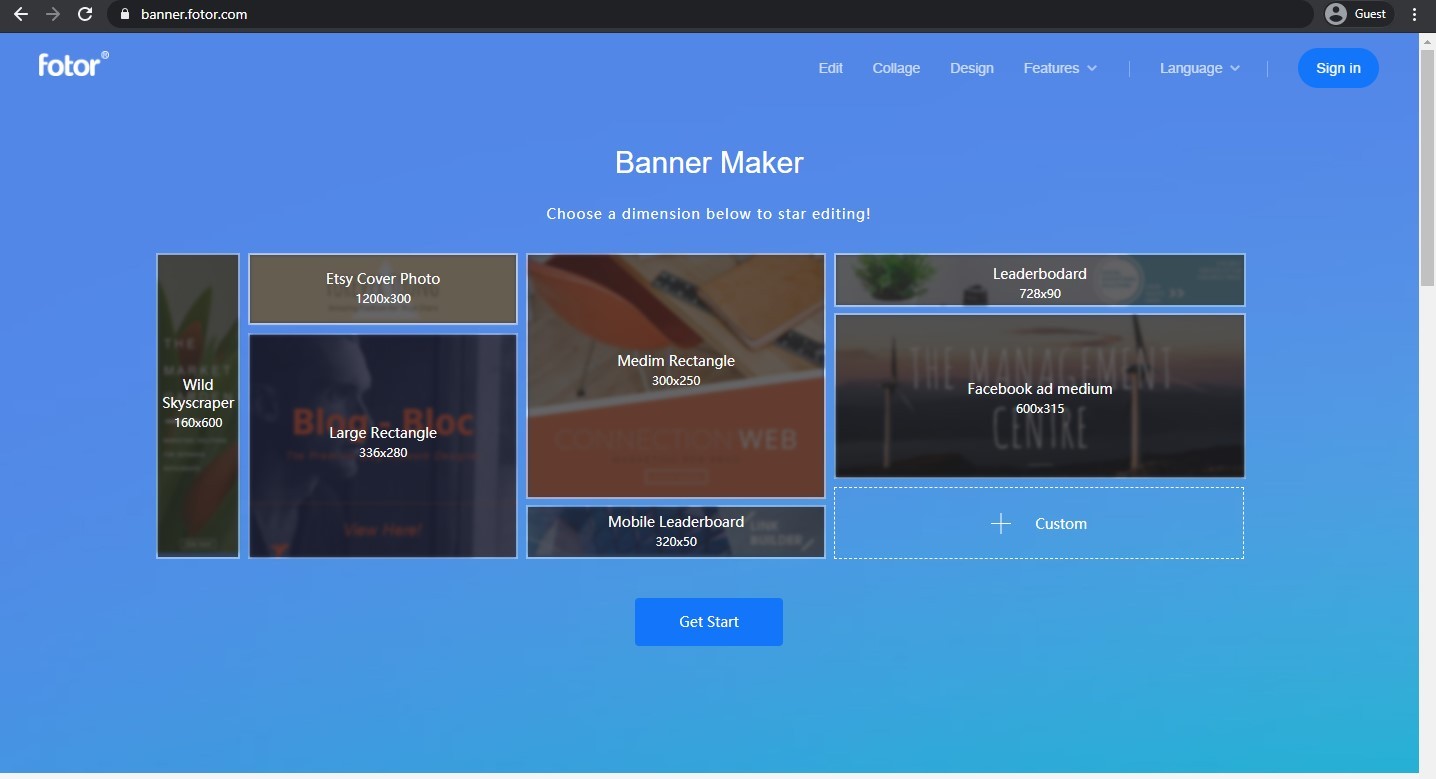
Fotor landing page
Picmonkey is another example of a comprehensive banner designer, although only the most basic operations and functions are available free of charge.
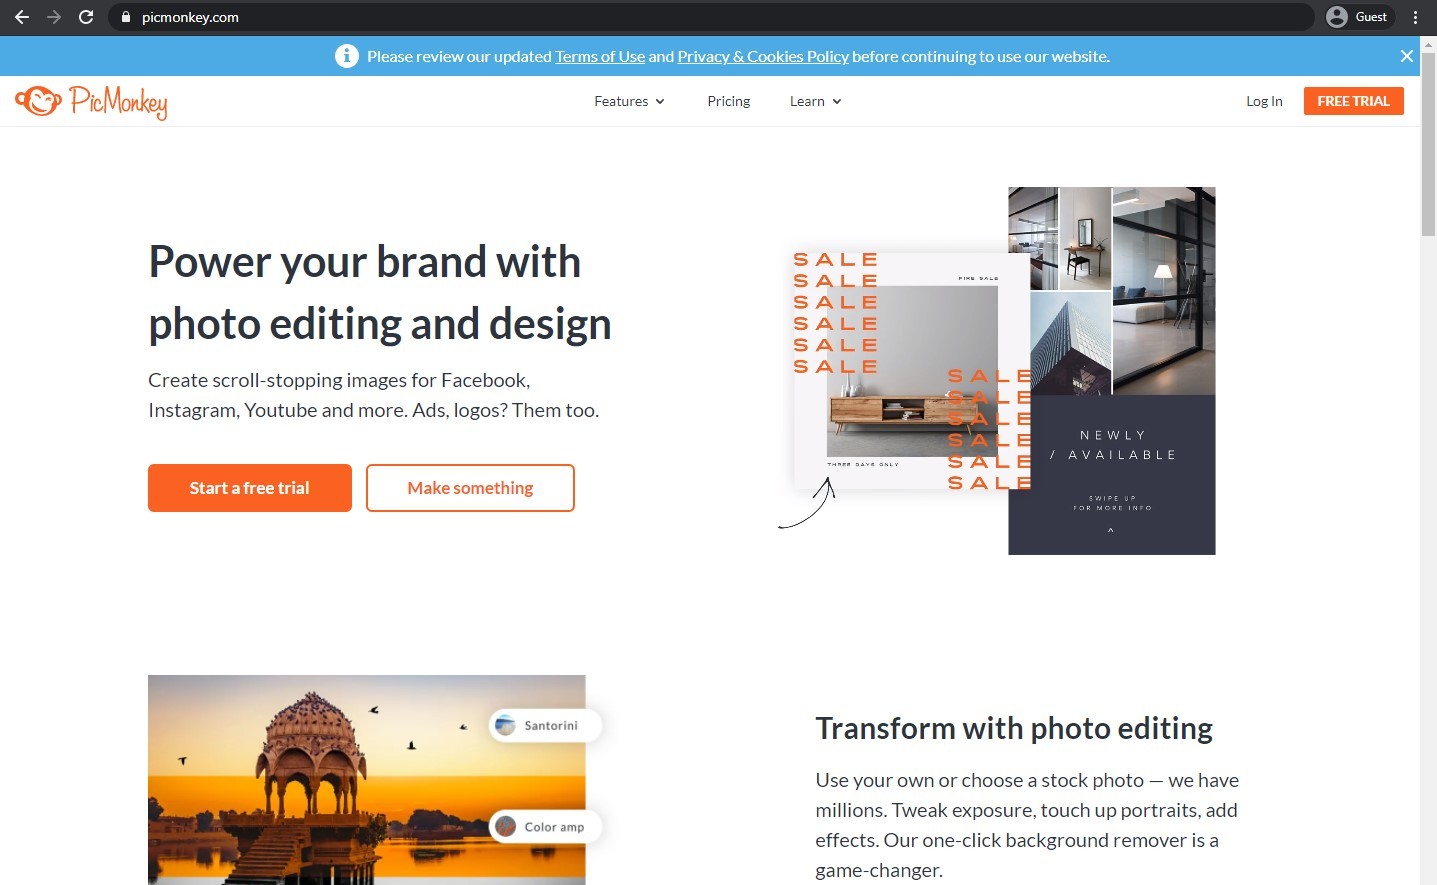
Picmonkey landing page
Canva prides itself on its extensive template/shape library, which makes it one of the highly-regarded online image editors. The existence of a number of basic image editing features allows for every design process to become an exciting adventure.
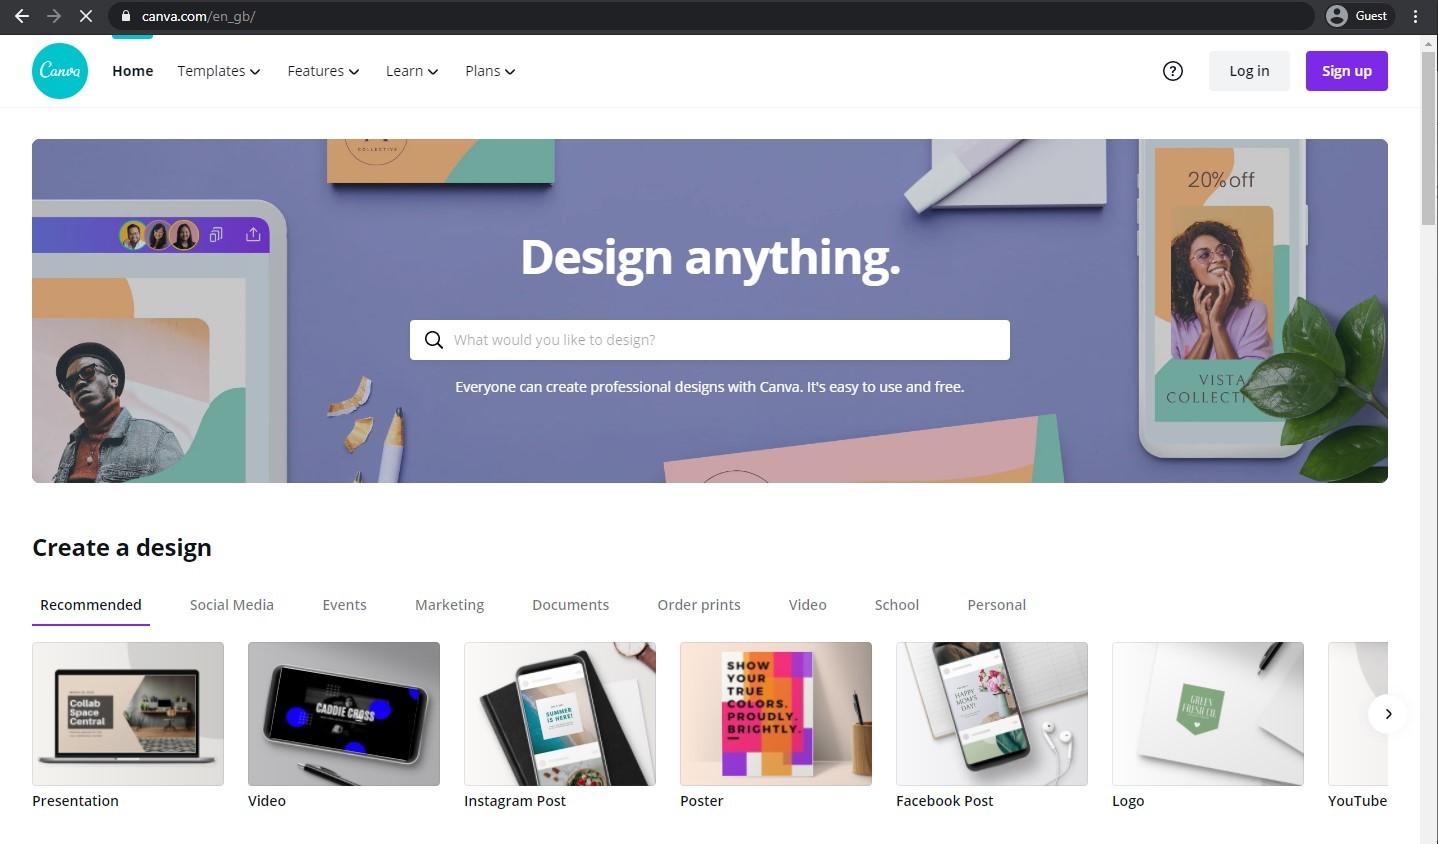
Canva landing page
Crello, on the other hand, puts compatibility as its prime driving force, offering many different templates not only for ads themselves, but also for social media posts, video thumbnails, and a lot more.
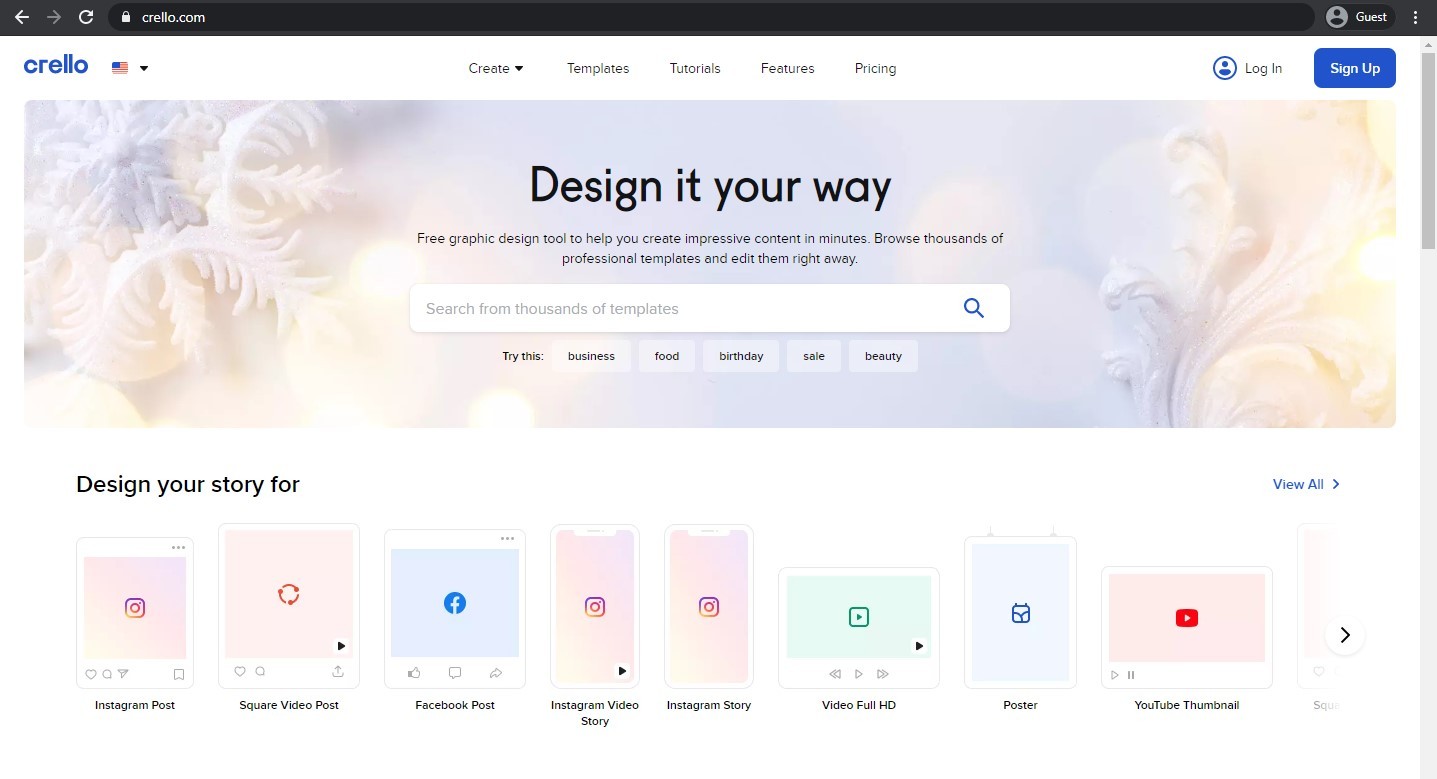
Crello landing page
Pixlr is somewhat similar to Photoshop in its extensive editing capabilities, and there are also two different versions available – the lightweight Pixlr X and the professional Pixlr E.
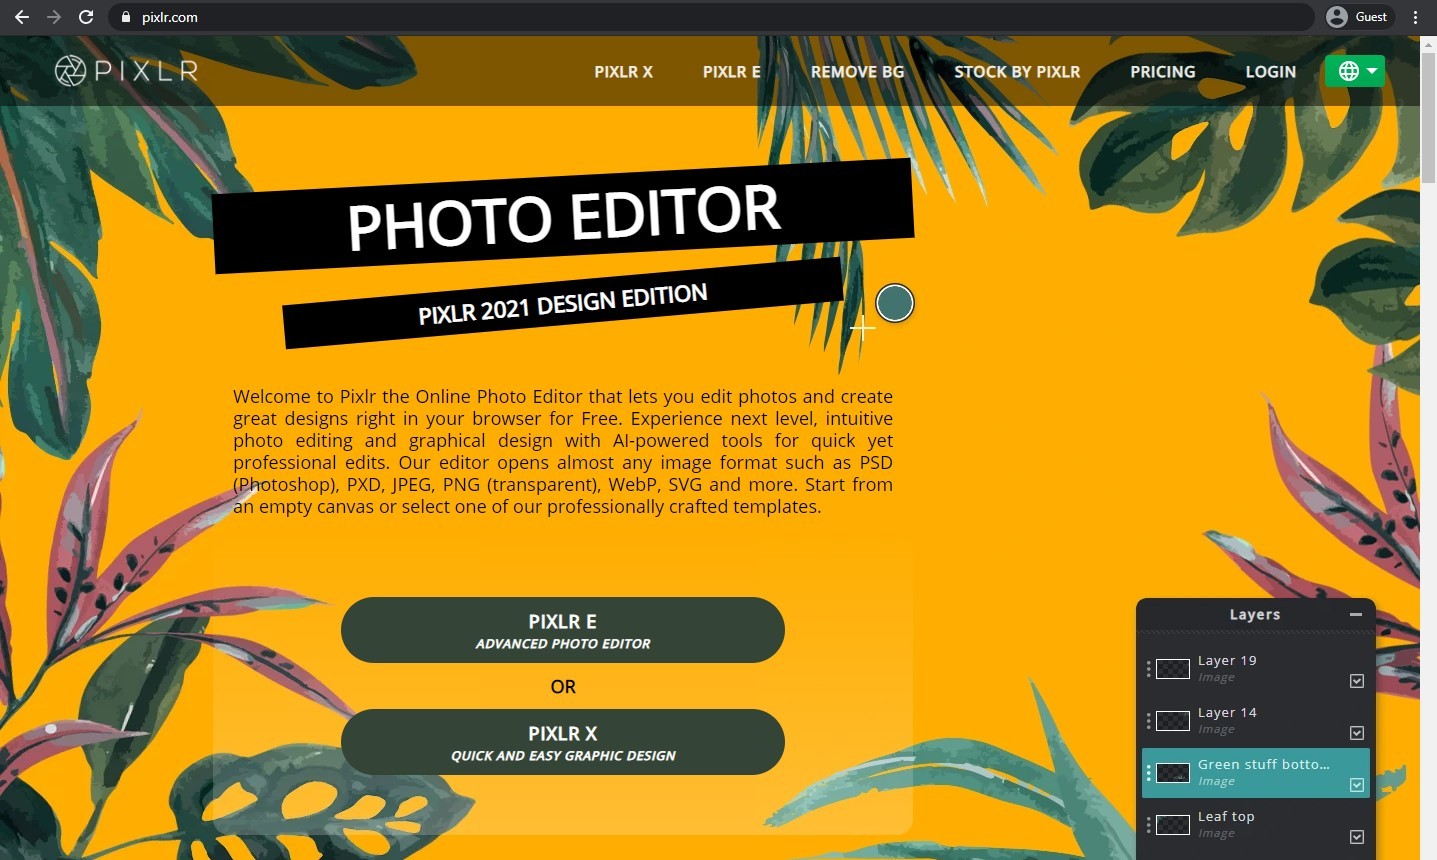
Pixlr landing page
Creatopy works as an entire web platform within one service, acting as both a comprehensive banner creator and an analytical tool for your advertisement campaigns.
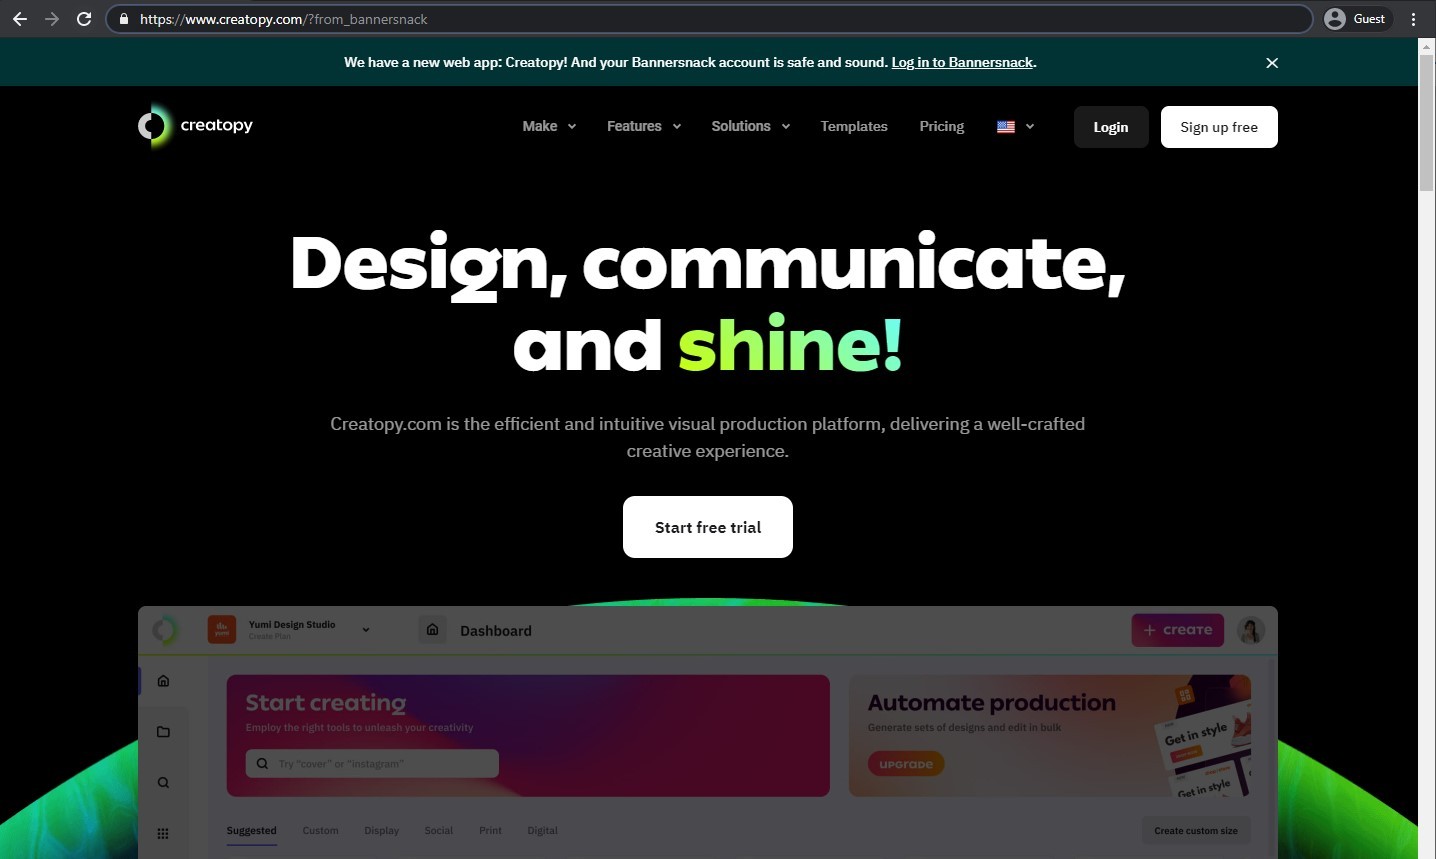
Creatopy landing page
Adobe Spark is another product from Adobe that is highly regarded for its vast capabilities in image editing, customization and interface versatility, allowing for one of the best experiences on the market.
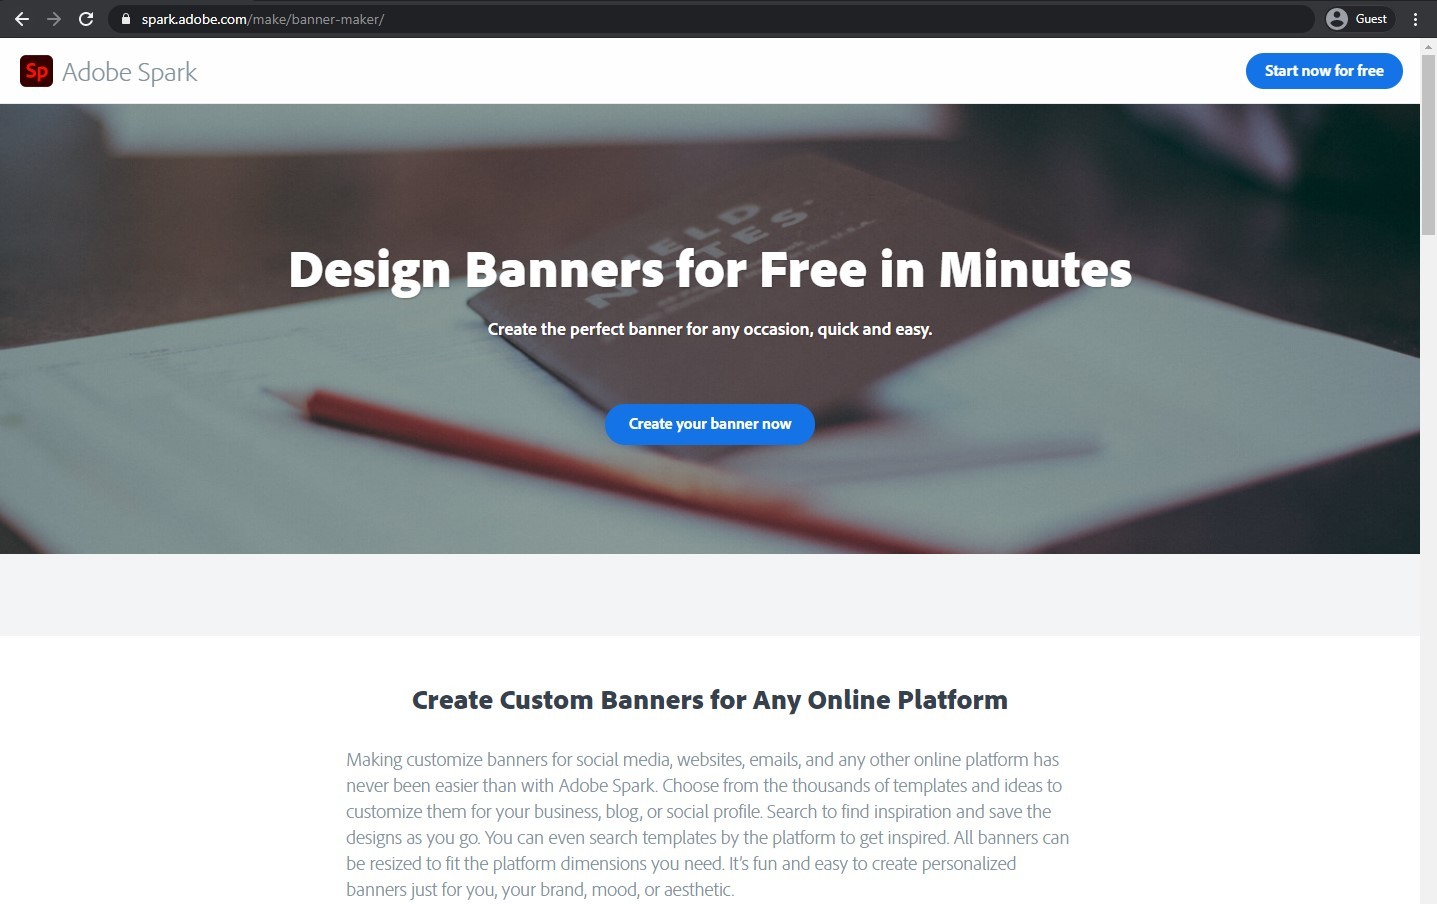
Adobe Spark landing page
Venngage’s template/object library might not be the largest on the market, but it’s certainly high enough to be noticed, with a large array of fonts, icons and other means of making your banner as special as possible.
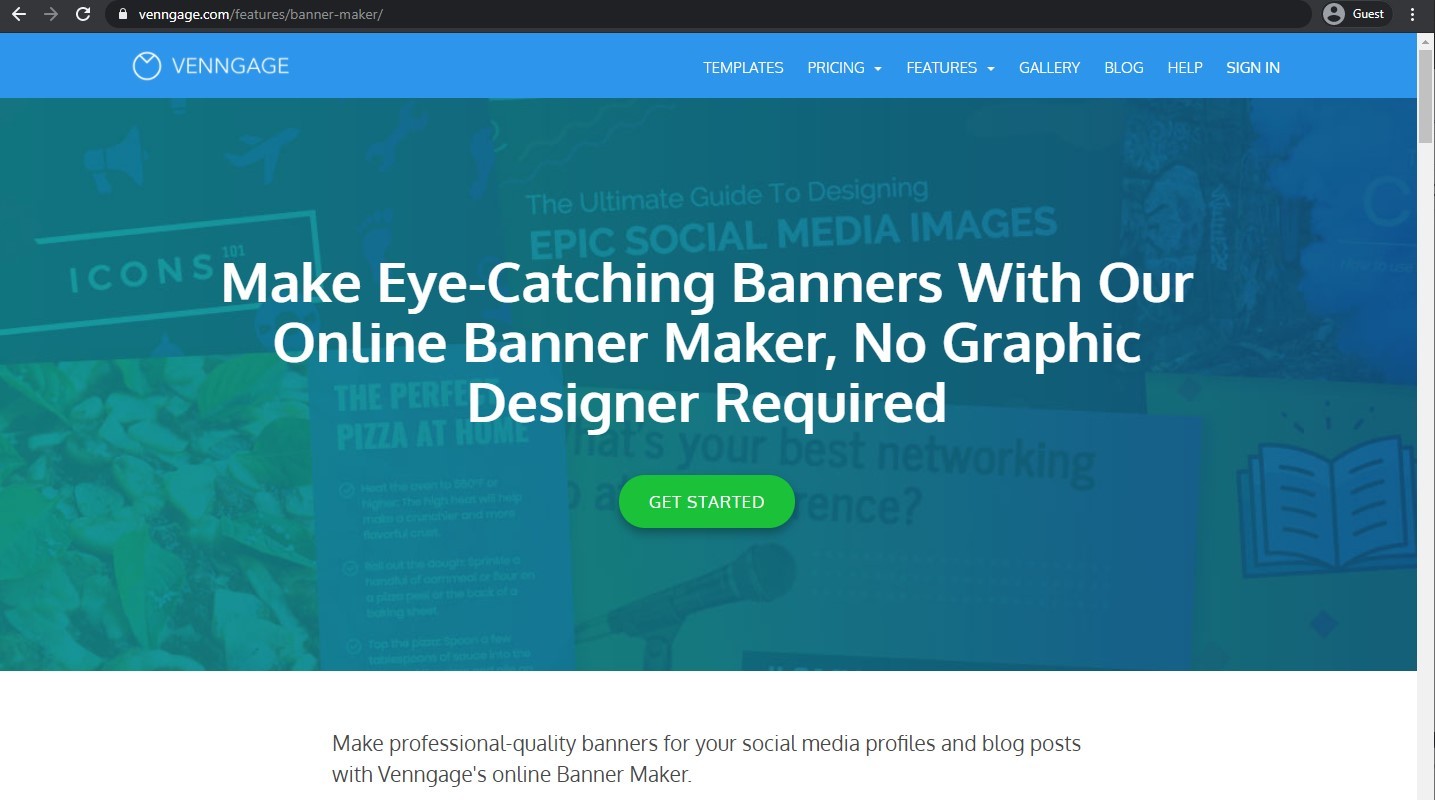
Venngage landing page
Snappa is all about simplicity, making it possible for people with little to no design experience to create or modify images to create one-of-a-kind banners for many different purposes.

Snappa landing page
In most cases, the process of interacting with an online banner creator is relatively simple. First, you’ll have to choose the starting parameters of a banner (or choose one of the templates). Next, you’ll have the option of customizing your banner with images, objects, text boxes, etc. And the last part is saving the image in question or exporting it to be used later.
#3 Using a smart approach – working with a single platform for all your design needs
Speaking of online banner constructors – there’s another effective example that we’d like to talk about. If you have no drawing skills, but would like to create banner ads like a pro, there is one approach you have to pay attention to. Check out Viewst - the online design app that is well-structured and user-friendly, providing you with the tools to easily create ads at scale. Moreover, you will be able to create eye-catching and interactive ads without writing a single line of code for just $19/month. Remember, in the #1 approach we questioned ourselves whether it is worth to pay $15 for a single interaction with the designer. Now, just consider the possibilities when you’re paying $19 for monthly use of a design app that gives you the ability to generate banners in bulk.
A short video tutorial will give an idea of how it works (teaser: even children understand its interface so it won’t be difficult at all for you to make banners right after you sign up).
We can actually show some of the Viewst’s capabilities by presenting a step-by-step guide on how the ad builder works.
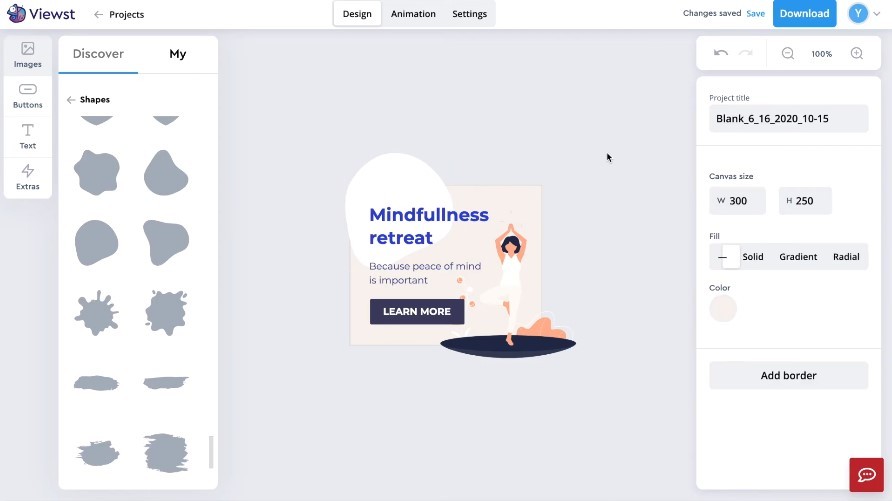
1. Create new project of a banner you need
After logging in to your Viewst account, you’ll be presented with an option to create a new banner. The first step of this process is in choosing the correct file dimensions for your future banner.
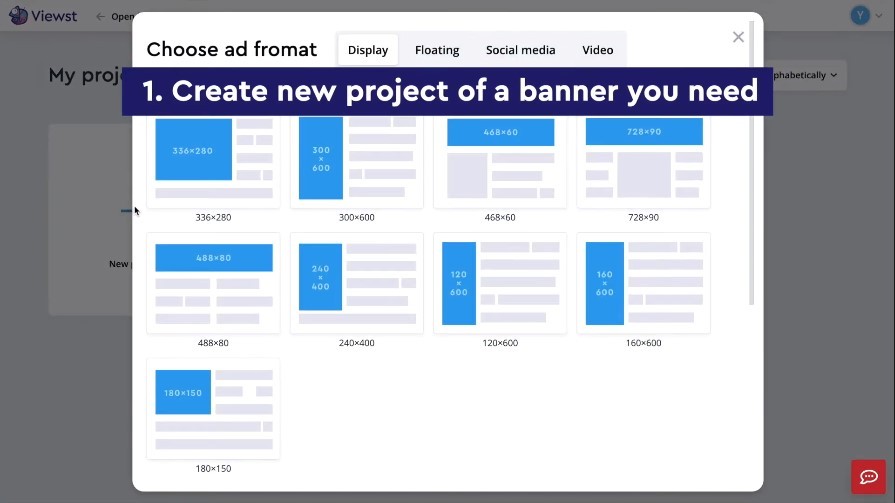
creating a banner
Next, you’ll be presented with a choice of starting an entirely new banner from scratch or using one of the existing templates as a basis.
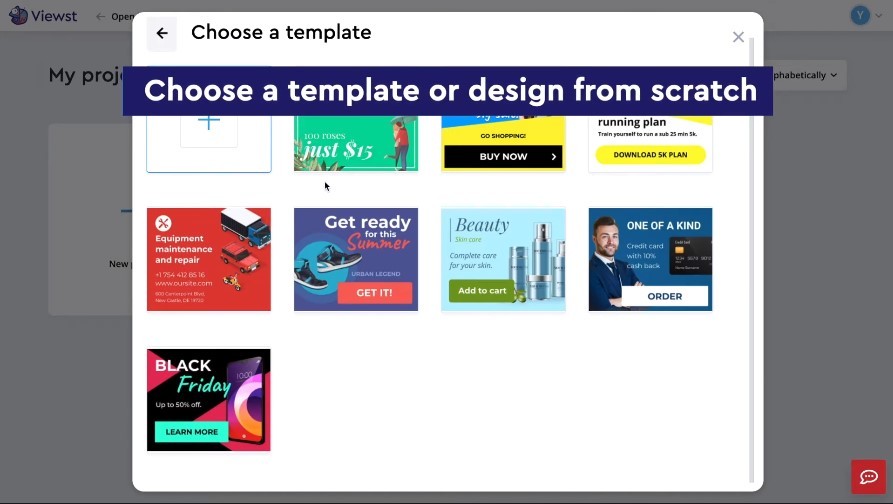
choosing a template
2. Since we’re working with a blank slate in our example, we’ll start with adding some text to it first.
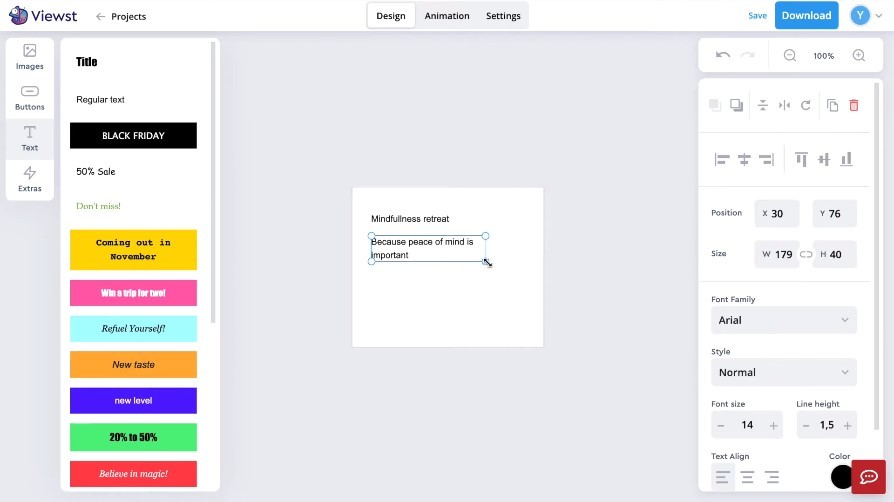
placing text
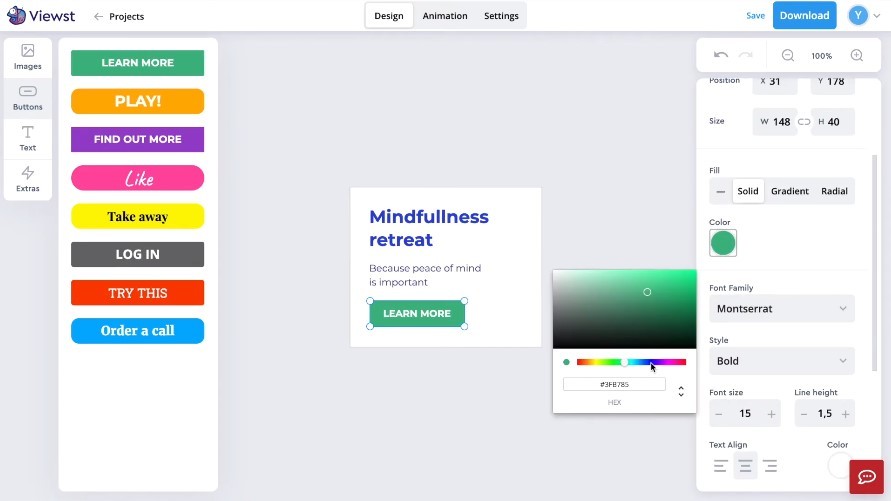
It’s also possible to choose your favourite color and font for each of your text boxes, if you wish to do so. Here’s how we’ll do it.
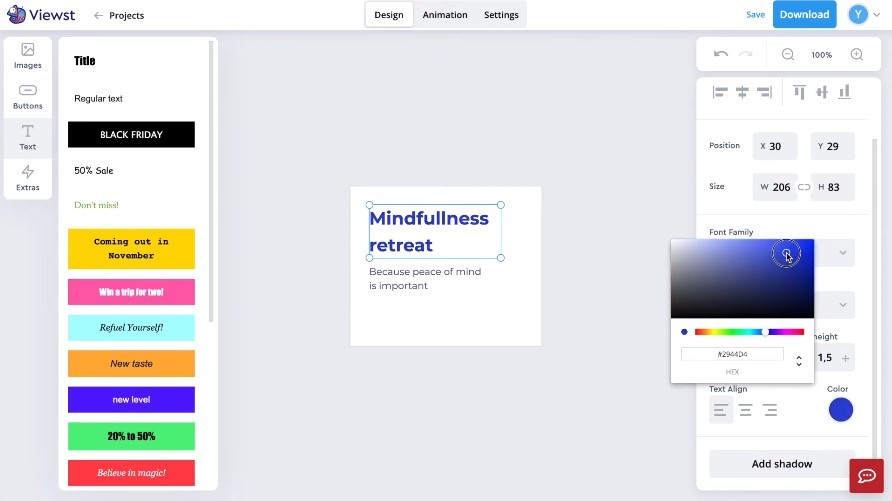
customizing text boxes
3. Add a Call to Action button, which is important as an effort to motivate the viewer to click on your banner in the first place. The entirety of a CTA button is also fully customizable.
customizing a CTA button
4. You can also add images to your banner from several different sources, be it Viewst’s own library, one of the many Internet’s photo stocks or even your own computer.

adding images
5. That’s not to say that you can only decorate your banner with images and text boxes – you can also add many other shapes or objects to serve as an additional customization method.
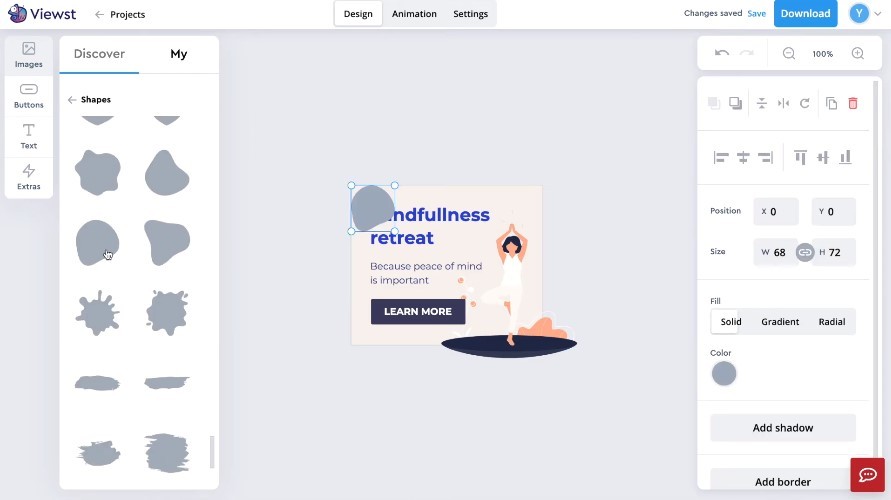
adding shapes
customizing shapes
6. When you’re all done with the static part of your banner, you can also animate some parts of it to make it even better. This is where the entire Animation tab of Viewst comes in, allowing you to add animations and transitions to each and every single one of the banner’s elements.
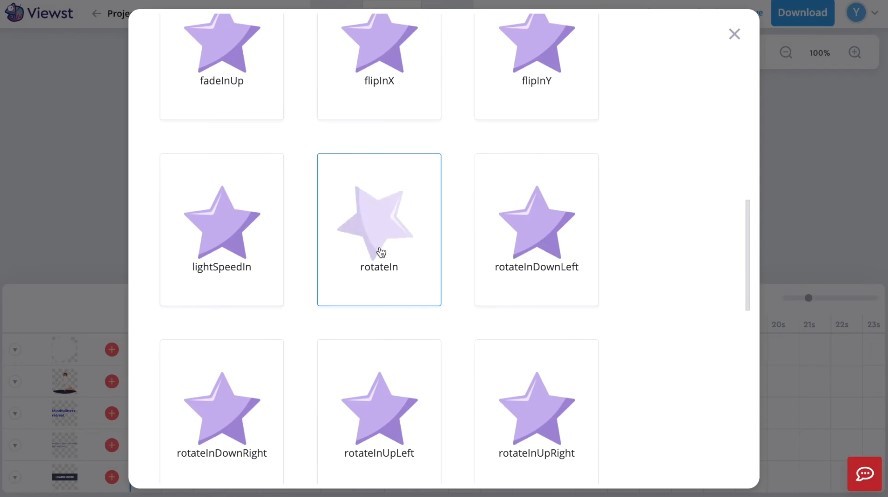
adding animation
7. Additionally, you can always tune each part of your animation with an easy-to-use timeline in the lower part of the screen.
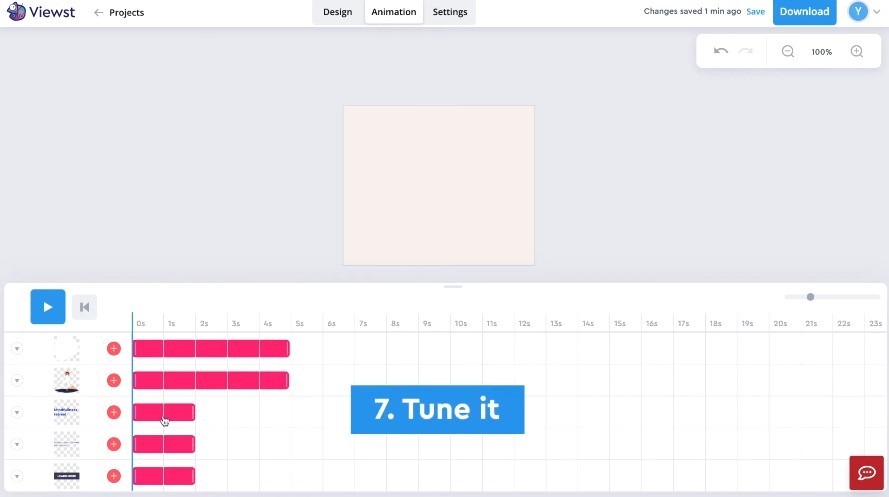
customizing animation
8. Click the “Play” button to preview animation, if you want to see how your banner would look in the end.
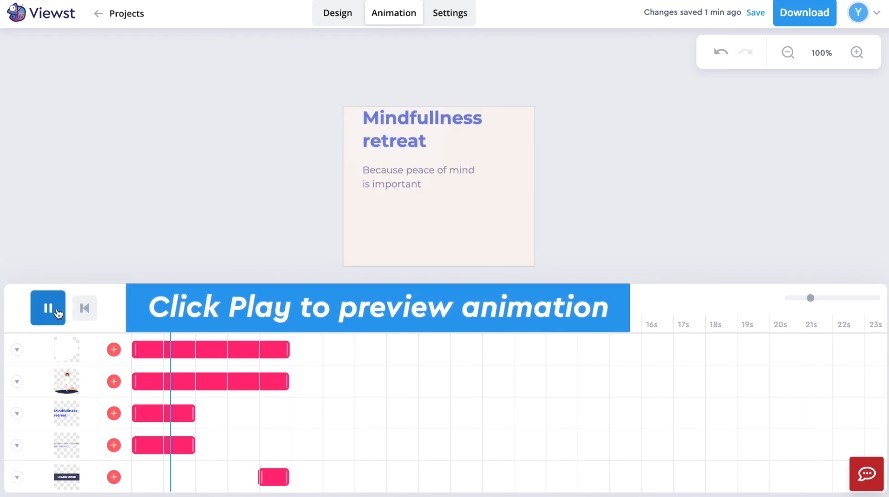
previewing animation
9. When you’re all done with banner editing, it’s time to save it in a desired format, choosing from a number of formats that Viewst offers.
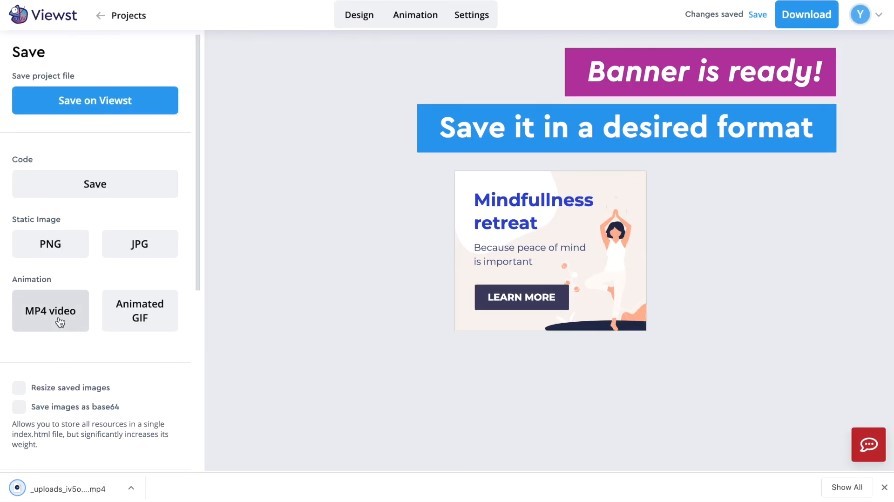
saving a template
Now that we’re done with the whole banner creation process, let’s talk more about the variation that Viewst can offer.
So, what type of banners you may create on Viewst platform:
Display Ads of any kind that are compatible with various ad networks
Example of Mobile Ads
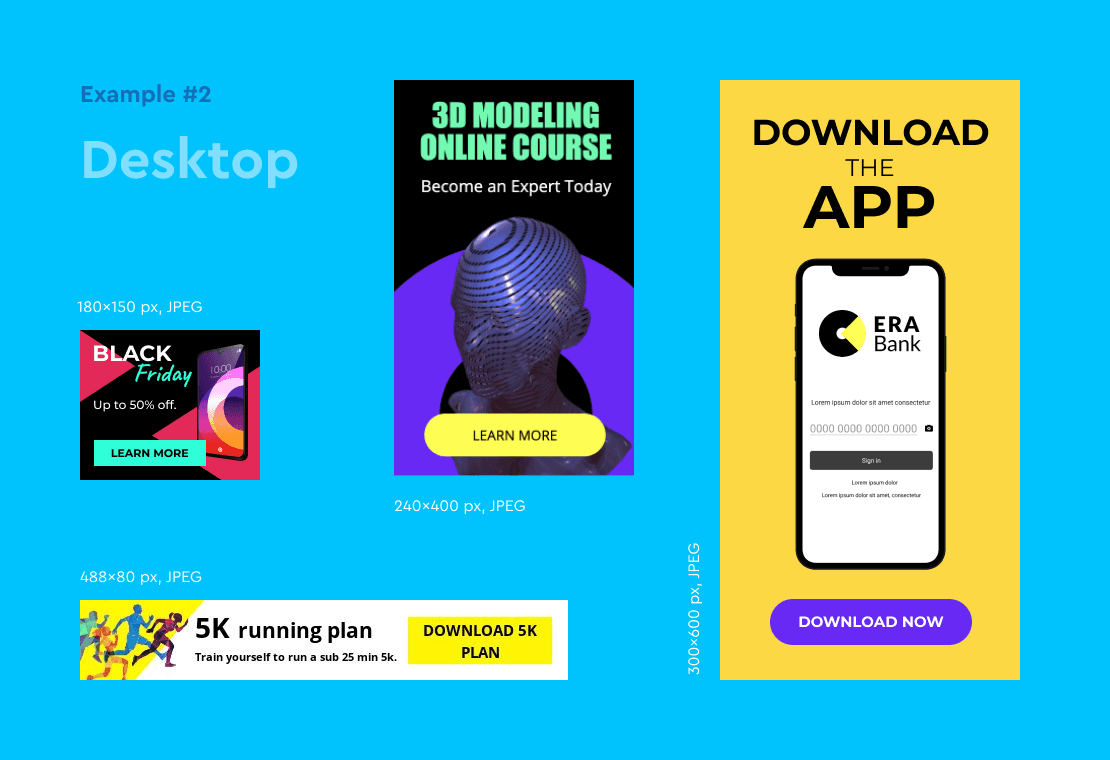
Example of Desktop Ads
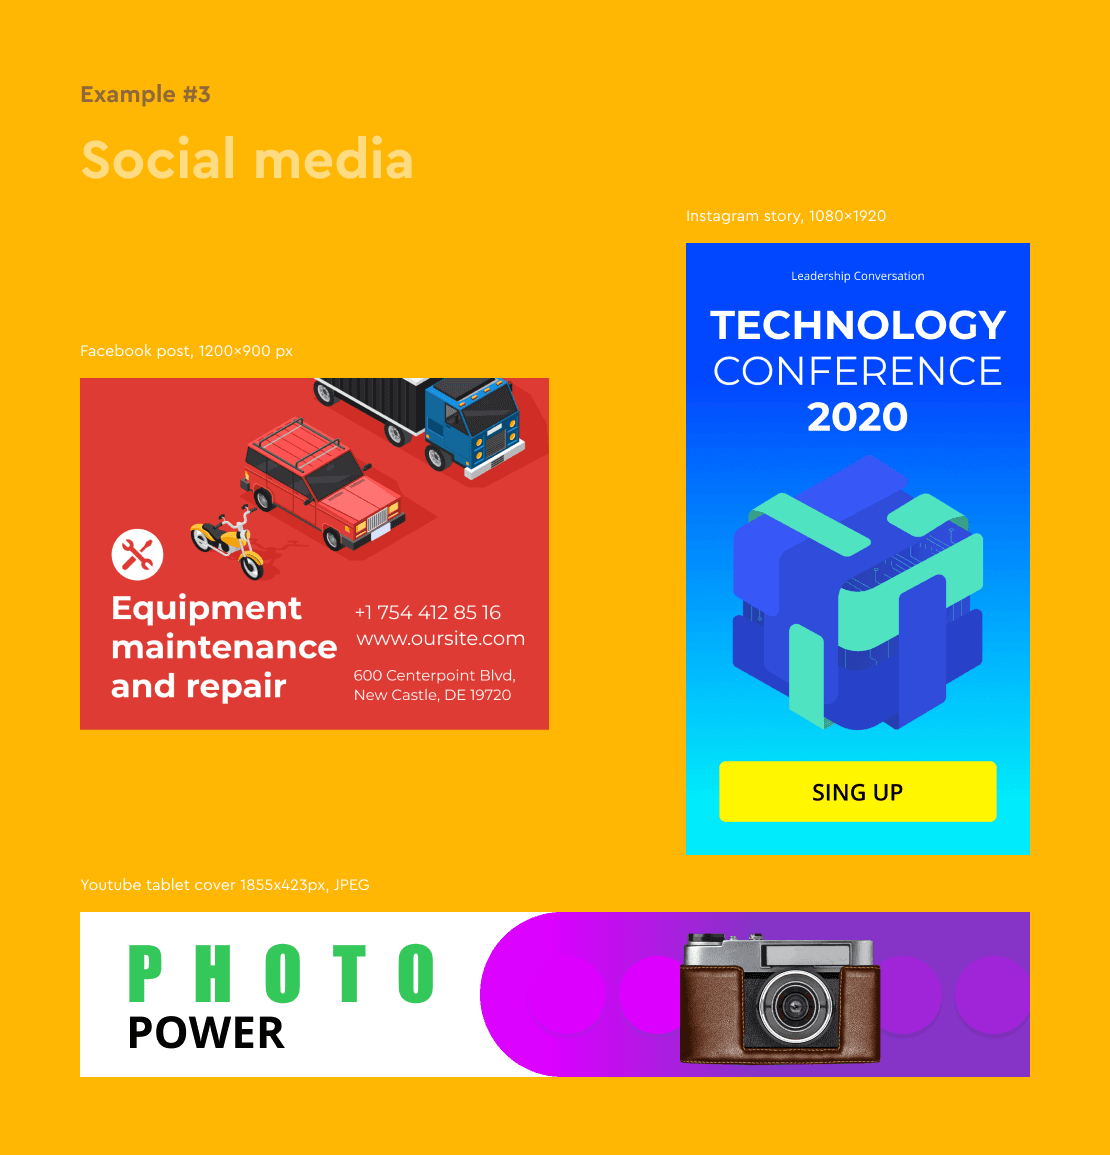
Social Media Ads for posts, covers, stories or teasers
Floating Ads: high-end rich media ads that overlay the content.
Video ads: enriched clickable video ad units that are fixed or overlay the content
4 Banner design tips from a professional designer
The American Institute of Graphic (AIGA) defines graphic design as “the art and practice of planning and projecting ideas and experiences with visual and textual content.” In other words, graphic design helps to communicate certain ideas in a visual way. To make such communication effective, you need to follow these basic principles of graphic design:
Balance - visual interpretation of gravity in the design and the proper distribution of design elements.
Contrast - the presentation of two elements of the design in opposite ways that gives objects greater visual weight, therefore balancing the image
Emphasis - drawing the viewer's attention to a specific design element in a way that makes it stand out, distinct from the rest of the elements
Proportion - the relationship of two or more elements in a design and how they compare with one another. This is when all parts are properly balanced and relate well with each other and create a feeling of unity.
Our designer also collected a few more tips for you to create a visually appealing banner that looks like it was designed by a pro. Using these tips will help you to start thinking like a designer.
1. Composition and Space
Highlighting a major component within your banner space allows you to control the attention of your user. Usually, the most important elements of the banner are dominating so leave some space between elements if you can. Keep your banner blocks from sticking to each other while also not placing text too close to the edges.
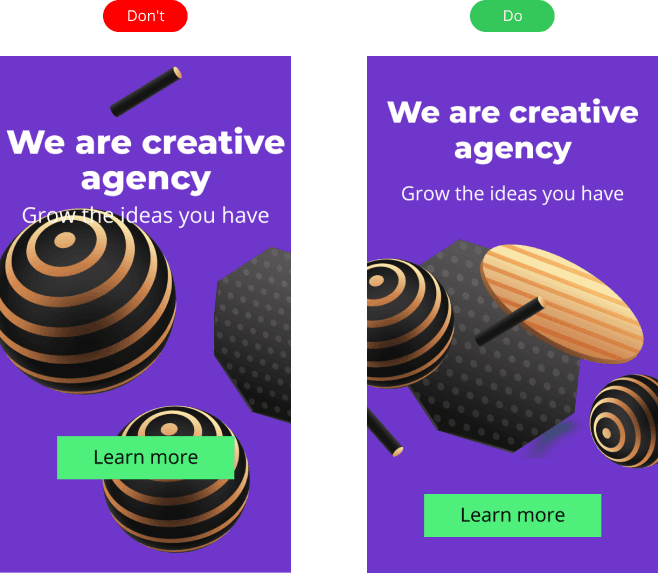
Example of Good vs. Bad Composition and Space Principle in a banner
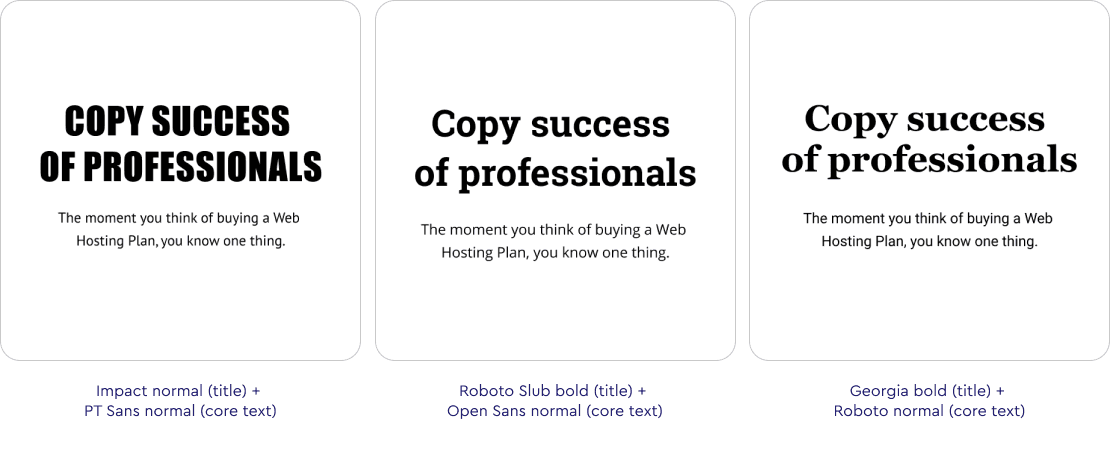
2. Fonts
Do not use too many different fonts. Instead, stick to the font hierarchy. Beginners can build a font composition using just one font then add different styles (bold + normal) and sizes.
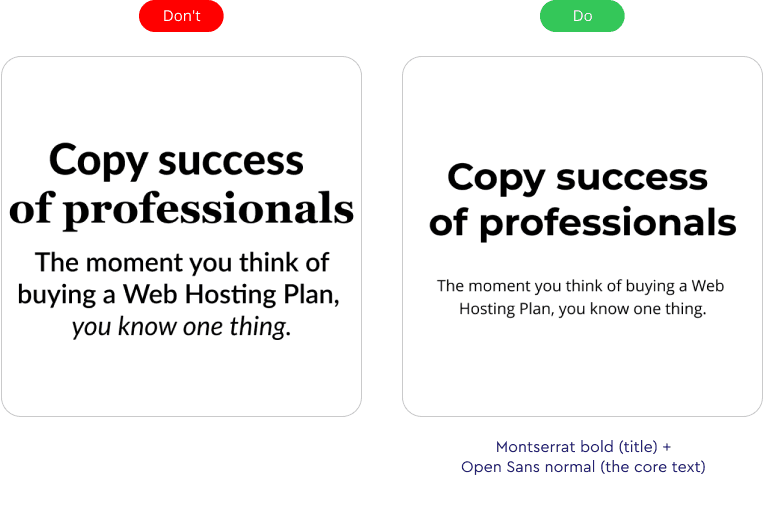
Below are the best font combinations available on Viewst that could be used for your banner’s design:
3. Color
Pure colors and the right color combinations will help improve the design of the banner. Try not to use too many colors. Here you can find high-quality colors and collect your own palette http://colrd.com/. Also, you may play with some gradients, which could be found here

Example of Good vs. Bad Color Combinations
4. Images
Use high-quality graphics to make your visuals eye-catching. Avoid using images that are grainy, blurry, or pixelated. Use a simple 200% zoom test to check whether your image is fine. Professional stock photo sites like Unsplash, Pixabay offer the finest free images, stock photos that were hand-selected, and only the best ones are accepted.
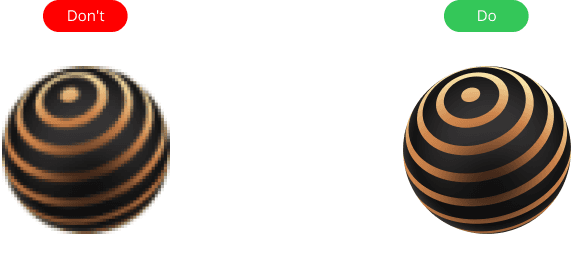
Example of blurry image and high-quality image

Victoria is the CEO at Viewst. She is a serial entrepreneur and startup founder. She worked in Investment Banking for 9 years as international funds sales, trader, and portfolio manager. Then she decided to switch to her own startup. In 2017 Victoria founded Profit Button (a new kind of rich media banners), the project has grown to 8 countries on 3 continents in 2 years. In 2019 she founded Viewst startup. The company now has clients from 43 countries, including the USA, Canada, England, France, Brazil, Kenya, Indonesia, etc.